 |
| Entire body scuffed and the first coat of Rage Gold body filler is applied |
The Home-school Coupe

Saturday, November 2, 2013
Sand and Fill
Nothing too exciting just sanding and filling the body
Thursday, September 12, 2013
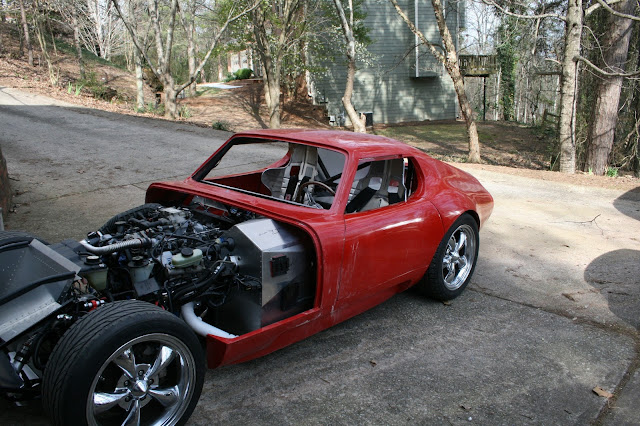
Fun Size Comparison
In your head you know the coupe is a small car but it never really sinks in until you park it between a Ford Explorer and Nissan Leaf


Saturday, August 17, 2013
Vacation Build Part 2
Not a lot exciting to see. All the seams where the body molds were bolted together have now been sanded flat reveling the high and low spots between the panels that need to be filled.


 |
| My New Favorite Tool |


Tuesday, August 13, 2013
vacation build 2013
Family life has been pretty busy lately so not much has happened with the coupe until now. I still have quite a bit of vacation time left this year so I took a week with the intention of grinding out a bunch of work on the car. Day one involved completing the body mount points, opening up the rest of the body cutouts and installing the headlight buckets and turn signals.

 Day 2 we assembled the side windows in their frames and trimmed the doors so the frames fit. Now bodywork begins in earnest.


We discovered the depth of the bonnet on the drivers side was about 1/4 too deep so we cut the lower section off cut a wedge out of it and fiber glassed it back in place.


We discovered the depth of the bonnet on the drivers side was about 1/4 too deep so we cut the lower section off cut a wedge out of it and fiber glassed it back in place.


Tomorrow will be a family day so the plan for Thursday is to begin grinding the seams and applying Rage Gold body filler.
Saturday, May 4, 2013
Exhaust Complete
A few weeks back I traded my coupe side pipes for FFR Roadster pipes since mating them to the modular J pipes was much easier. The sound quality is a lot better than I was expecting. Now to work on quieting down the accesory drive
Sunday, April 7, 2013
Mounting the hood
The hood is now attached to the hinges and the next step is to trim the back edge and align it with the cowling.


Saturday, March 30, 2013
Door Trimming and Fitting
Not a lot to write about but we were able to trim and hang the doors. We will adjust the gaps while doing the other bodywork but overall fit was pretty good. Next comes the hood.

Sunday, January 6, 2013
Mounting the body and door frames
This weekend we took advantage of the warmer weather and began the steps of prepping the body. This first requires that you scrub the body with BonAmi and a scotch bright pad to remove any mold release wax from the panels before doing any sanding or cutting. Once this step was done we mounted the body on the frame. After reading some other build blogs I was quite relieved with how well it fit with tolerances of about 1/8 inch at the mounting points this includes tail lights and windshield frame. Next we marked and mounted the gas cap followed by cutting slots for the door hinges. When it came to mounting the door frames it was discovered that Factory Five shipped us two passenger side frames so one will need to be swapped.


 |
| One of my favorite details the Lemans Gas Cap |
 |
| Nice tight tolerances at the mounting points |
 |
| SN95 rear with 355 tires |

 |
| Passenger side door frame |
 |
| Two passenger side frames |
Subscribe to:
Posts (Atom)