The Home-school Coupe

Saturday, May 4, 2013
Exhaust Complete
A few weeks back I traded my coupe side pipes for FFR Roadster pipes since mating them to the modular J pipes was much easier. The sound quality is a lot better than I was expecting. Now to work on quieting down the accesory drive

Sunday, April 7, 2013
Mounting the hood
The hood is now attached to the hinges and the next step is to trim the back edge and align it with the cowling.


Saturday, March 30, 2013
Door Trimming and Fitting
Not a lot to write about but we were able to trim and hang the doors. We will adjust the gaps while doing the other bodywork but overall fit was pretty good. Next comes the hood.

Sunday, January 6, 2013
Mounting the body and door frames
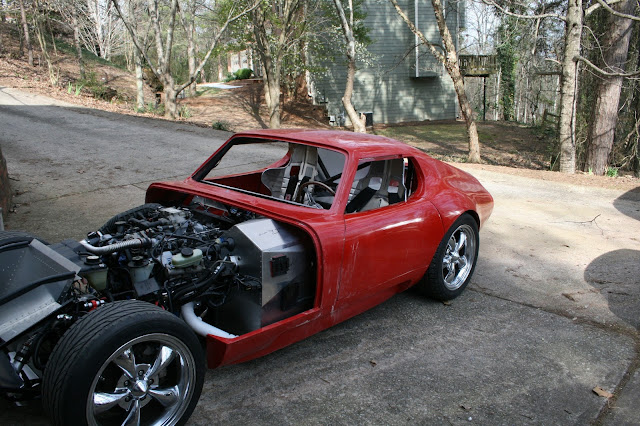
This weekend we took advantage of the warmer weather and began the steps of prepping the body. This first requires that you scrub the body with BonAmi and a scotch bright pad to remove any mold release wax from the panels before doing any sanding or cutting. Once this step was done we mounted the body on the frame. After reading some other build blogs I was quite relieved with how well it fit with tolerances of about 1/8 inch at the mounting points this includes tail lights and windshield frame. Next we marked and mounted the gas cap followed by cutting slots for the door hinges. When it came to mounting the door frames it was discovered that Factory Five shipped us two passenger side frames so one will need to be swapped.


 |
| One of my favorite details the Lemans Gas Cap |
 |
| Nice tight tolerances at the mounting points |
 |
| SN95 rear with 355 tires |

 |
| Passenger side door frame |
 |
| Two passenger side frames |
Monday, November 5, 2012
More OEM Details
In a continual quest to use as many OEM parts as practical here is our latest. The instructions from Factory Five have you use toggle switches on the dash for turn signals, high beams, wipers etc. Since we were already using the OEM harness and relay controls it made sense to try and incorporate the stalk controls from the donor mustang. Mounting the multifunction switch required welding a 5" length of angle iron to the dash framework. For those wondering yes we test fit this with the body and door in place to ensure it cleared first.


Saturday, September 1, 2012
Drivers Side Footbox and Fuse Panel
Normally FFR has you mount the fuse panel in a typical OEM fashion under the dash. With the easy access to the outside of the foootbox on the coupe we decided to try something different. I think it turned out pretty well.


Tuesday, August 21, 2012
Go Cart
We finally got all those details complete that make it a car....everything else at this point is cosmetic. First impressions....it's blindingly fast and driving my GT mustang is now sort of a letdown ;)
Here we are terrorizing the neighborhood with open headers :)
Here we are terrorizing the neighborhood with open headers :)
Subscribe to:
Posts (Atom)